
Thursday, November 29, 2012
mia till monday 3/12
hi all! i am outstation to attend wedding of my hubby's niece will only be back on monday next week in case you cant find me lol tysm hugs xoxo
Friday, November 23, 2012


Monday, November 19, 2012
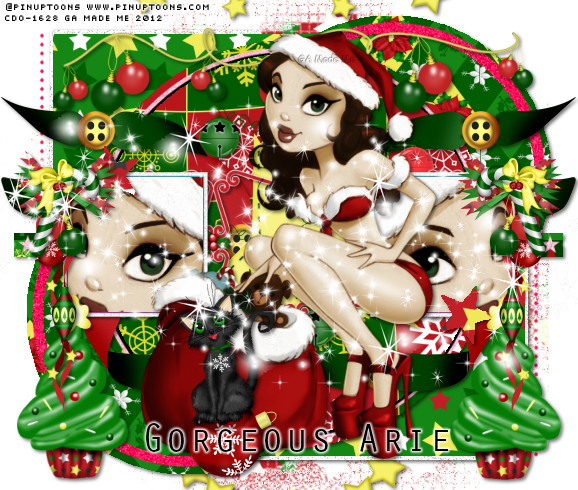
Holly Christmas (PTU-EM)
ARTWORK: Artist @ ELLIE MILK
In Order to use the image in this tutorial you MUST purchase it from PICSFORDESIGN.COM
PSP 9 (Any Version Will Work)
SCRAP KIT: Holly Christmas From Shell
MASK: Rieka mask no 4
TEMPLATE: No Template
FONT: Orator Std
SNOW ANIMATION: I dont supplied them
Okay Lets Begin!
Open new canvas 550X550
Paste paper 3 as a new layer.
Activate your mask
Go to load/save mask
Load mask from disk
Find your mask and click load.
Open your frame.
Colorize to your liking with the paper of your choice.
Paste a tube of your choice as a new layer.
Place to your liking then paste your elements as a new layer.
Elements are
frame 2
lanternbanner 1
christmas lights 2
holly 1
present 3
tree 1
bauble 9
reindeer 1
bird 1
bow 1
boot 1
my sparkles
Pls resize to your liking.
Use my tag above as a guide.
I resize all my elements to 30% to 50%
Dont forget to put drop shadow of choice to all layers.
Add your name and copyright info
Now will go for my snow animations thingy lol
very easy :)
open your snow animation in animation shop
they have 10 frames
open your tag and duplicate them till you
have 10 frames
then go to your snow click copy
then go to your tag paste into selected frame
Lastly view animation saved them as gif
You are done!
Thanks for trying my tutorial.
***Gorgeous Arie 2012***
You are done!
Saturday, November 17, 2012
Christmas Cheer (PTU-AV)
ARTWORK: Artist @ ALEHANDRA VANHEK
In Order to use the image in this tutorial you MUST purchase it from PICSFORDESIGN.COM
PSP 9 (Any Version Will Work)
SCRAP KIT: ChristmasCheer From Krissy
MASK: Aqua mask no 16
TEMPLATE: Missy Template No 379
FONT: Aquarelle
Okay Lets Begin!
Open new canvas 550X550
Paste paper 1 as a new layer.
Activate your mask
Go to load/save mask
Load mask from disk
Find your mask and click load.
Open your template.
Colorize to your liking with the paper of your choice.
Paste a tube of your choice as a new layer.
Place to your liking then paste your elements as a new layer.
Elements are
bunting strip 1
striped christmas bauble 1
string 3
snowgirl 2
snowman head 1-felt
polkadot helium balloon 3
bow 1
hat gift box 3
mini plastic candy 4
candy cane 1
lcicles 1
my sparkles
Pls resize to your liking.
Use my tag above as a guide.
I resize all my elements to 30% to 50%
Dont forget to put drop shadow of choice to all layers.
Add your name and copyright info
Now will go for my snow animations thingy lol
very easy :)
open your snow animation in animation shop
they have 10 frames
open your tag and duplicate them till you
have 10 frames
then go to your snow click copy
then go to your tag paste into selected frame
Lastly view animation saved them as gif
You are done!
Thanks for trying my tutorial.
***Gorgeous Arie 2012***
You are done!
Thursday, November 15, 2012


Wednesday, November 7, 2012
Rhumbard Crumble (PTU-EC) Tag No 1
ARTWORK: Artist @ ELIAS CHATZOUDIS
In Order to use the image in this tutorial you MUST purchase it from EAS
PSP 9 (Any Version Will Work)
SCRAP KIT: Rhumbard Crumble from Kez
MASK: WSL mask no 178
TEMPLATE: no template
FONT: Aquarelle
Okay Lets Begin!
Open new canvas 500X500
Paste paper 17 as a new layer.
Activate your mask
Go to load/save mask
Load mask from disk
Find your mask and click load.
Open your frame paste them one by one.
Colorize to your liking with the paper of your choice.
Paste a tube of your choice as a new layer.
Place to your liking then paste your elements as a new layer.
Elements are
F2
E34
E21
E24
E13
E28
E10
E37
E18
my sparkles
Pls resize to your liking.
Use my tag above as a guide.
I resize all my elements to 30% to 50%
Dont forget to put drop shadow of choice to all layers.
Add your name and copyright info
Now will go for my animation sparkle thingy lol
Some are doing different way this is how i did for my animation
:)
Go to layer 2(mask) constellation 2.20 50 60 0 100 75 click ok
Go to layer 3(frame) constellation click ok
Go to layer 4(tube) vm sparkle click no 20
First layer save them as tag1gif.
now do it again the same method but changing the number of the size :)
Go to layer 2(mask) constellation click random seed 1x
Go to layer 3(frame) constellation click ok
Go to layer 4(tube) vm sparkle click no 25
Second layer save them as tag2gif.
Go to layer 2(mask) constellation click random seed 1x
Go to layer 3(frame) constellation click ok
Go to layer 4(tube) vm sparkle click no 30
Third layer saved them as tag3gif.
Lastly open yr jasc animation
Open yr tag1gif,tag2gif,tag3gif
Then view animation
Saved them as gif.
You are done!
Thanks for trying my tutorial.
***Gorgeous Arie 2012***
Rhumbard Crumble (PTU-Verymany) Tag No 2

ARTWORK: Artist @ VERYMANY
In Order to use the image in this tutorial you MUST purchase it from PICSFORDESIGN.COM
PSP 9 (Any Version Will Work)
SCRAP KIT: Rhumbard Crumble from Kez
MASK: Aqua mask no 16
TEMPLATE: Dolly's template
FONT: P22 Corinthia
Okay Lets Begin!
Open new canvas 500X500
Paste paper 1 as a new layer.
Activate your mask
Go to load/save mask
Load mask from disk
Find your mask and click load.
Open your template paste them one by one.
Colorize to your liking with the paper of your choice.
Paste a tube of your choice as a new layer.
Place to your liking then paste your elements as a new layer.
Elements are
E4
E13
E16
E18
E34
E9
E12
E24
E26
E29
my sparkle
Dont forget to put drop shadow of choice to all layers.
Add your name and copyright info
You are done!
Thanks for trying my tutorial.
***Gorgeous Arie 2012***
Peppermint Twist (PTU-EC)

ARTWORK: Artist @ ELIAS CHATZOUDIS
In Order to use the image in this tutorial you MUST purchase it from EAS
PSP 9 (Any Version Will Work)
SCRAP KIT: Peppermint Twist from Krissy
MASK: WSL mask no 14
TEMPLATE: no template
FONT: Orator Std
Okay Lets Begin!
Open new canvas 500X500
Paste paper 14 as a new layer.
Activate your mask
Go to load/save mask
Load mask from disk
Find your mask and click load.
Open your frame paste them one by one.
Colorize to your liking with the paper of your choice.
Paste a tube of your choice as a new layer.
Place to your liking then paste your elements as a new layer.
Elements are
round off set frame 5
wrapped pine twigs 4
candy cane 4
festive sign post 3
glitter snowflake 3
holly cluster 2
quirky christmas tree 2
playful polar bears 2
striped xmas bauble 5
striped xmas bauble 2
striped xmas bauble 1
gingham wrap 4
eyelet ribbon 1
christmas bulb 5
elves stolking 2
rolly santa 3
beautiful bow 5
my sparkle
Dont forget to put drop shadow of choice to all layers.
Add your name and copyright info
You are done!
Thanks for trying my tutorial.
***Gorgeous Arie 2012***
My Rainbow World (PTU-EC)

ARTWORK: Artist @ ELIAS CHATZOUDIS
In Order to use the image in this tutorial you MUST purchase it from EAS
PSP 9 (Any Version Will Work)
SCRAP KIT: My Rainbow World from Shell
MASK: Vix mask no 232
TEMPLATE: Tracy's template no 9
FONT: SaginaW
Okay Lets Begin!
Open new canvas 500X500
Paste paper 1 as a new layer.
Activate your mask
Go to load/save mask
Load mask from disk
Find your mask and click load.
Open your template paste them one by one.
Colorize to your liking with the paper of your choice.
Paste a tube of your choice as a new layer.
Place to your liking then paste your elements as a new layer.
Elements are
frame 1
butterfly 2
cupcake 2
xochain 1
lipstick 1
button 1
crayons 1
cup of love 1
doodle 1
doodle 3
doughnut 2
bunny 1
my sparkle
Dont forget to put drop shadow of choice to all layers.
Add your name and copyright info
You are done!
Thanks for trying my tutorial.
***Gorgeous Arie 2012***
Friday, November 2, 2012
Denim Babe (PTU-KG)
ARTWORK: Artist @ KEITH GARVEY
In Order to use the image in this tutorial you MUST purchase it from KG
PSP 9 (Any Version Will Work)
SCRAP KIT: Denim Babe from Shell
MASK: Vix mask no 232
TEMPLATE: no template
FONT: Orator Std
Okay Lets Begin!
Open new canvas 500X500
Paste paper 2 as a new layer.
Activate your mask
Go to load/save mask
Load mask from disk
Find your mask and click load.
Open your frame paste them one by one.
Colorize to your liking with the paper of your choice.
Paste a tube of your choice as a new layer.
Place to your liking then paste your elements as a new layer.
Elements are
frame 2
fence 1
flower 1
umbrella 1
pin wheel 1
shoe 1
dog 1
bag 1
bird 1
butterfly 3
frame 1
my sparkles
Pls resize to your liking.
Use my tag above as a guide.
I resize all my elements to 30% to 50%
Dont forget to put drop shadow of choice to all layers.
Add your name and copyright info
Now will go for my animation sparkle thingy lol
Some are doing different way this is how i did for my animation
:)
Go to layer 2(mask) constellation 2.20 50 60 0 100 75 click ok
Go to layer 3(frame) constellation click ok
Go to layer 4(tube) vm sparkle click no 20
First layer save them as tag1gif.
now do it again the same method but changing the number of the size :)
Go to layer 2(mask) constellation click random seed 1x
Go to layer 3(frame) constellation click ok
Go to layer 4(tube) vm sparkle click no 25
Second layer save them as tag2gif.
Go to layer 2(mask) constellation click random seed 1x
Go to layer 3(frame) constellation click ok
Go to layer 4(tube) vm sparkle click no 30
Third layer saved them as tag3gif.
Lastly open yr jasc animation
Open yr tag1gif,tag2gif,tag3gif
Then view animation
Saved them as gif.
You are done!
Thanks for trying my tutorial.
***Gorgeous Arie 2012***
Fun Fever (PTU-EC)
ARTWORK: Artist @ ELIAS CHATZOUDIS
In Order to use the image in this tutorial you MUST purchase it from EAS
PSP 9 (Any Version Will Work)
SCRAP KIT: Fun Fever from Krissy
MASK: Vix mask no 234
TEMPLATE: NO TEMPLATE
FONT: Aquarelle
Okay Lets Begin!
Open new canvas 500X500
Paste paper 5 as a new layer.
Activate your mask
Go to load/save mask
Load mask from disk
Find your mask and click load.
Open your frame paste them one by one.
Colorize to your liking with the paper of your choice.
Paste a tube of your choice as a new layer.
Place to your liking then paste your elements as a new layer.
Elements are
string frame 1
wrought iron doodle 1
balloon 2
feather 1
hang bag 3
glass bottles 1
string 1
luxurious bow 3
top hat 1
staple 1
ribbon wrap 3
love bird 1
my sparkle
Dont forget to put drop shadow of choice to all layers.
Add your name and copyright info
Now will go for my animation sparkle thingy lol
Some are doing different way this is how i did for my animation
:)
Go to layer 3(frame) constellation 2.20 50 60 0 100 75 click ok
Go to layer 13(string) add noise gaussian click 40
Go to layer 4(tube) vm sparkle click no 20
First layer save them as tag1gif.
now do it again the same method but changing the number of the size :)
Go to layer 3(mask) constellation click random seed 1x
Go to layer 13(string) add noise gaussian click 35
Go to layer 4(tube) vm sparkle click no 25
Second layer save them as tag2gif.
Go to layer 3(mask) constellation click random seed 1x
Go to layer 13(string) add noise gaussian click 30
Go to layer 4(tube) vm sparkle click no 30
Third layer saved them as tag3gif.
Lastly open yr jasc animation
Open yr tag1gif,tag2gif,tag3gif
Then view animation
Saved them as gif.
You are done!
Thanks for trying my tutorial.
***Gorgeous Arie 2012***
Subscribe to:
Posts (Atom)