ARTWORK: Artist @ ELIAS CHATZOUDIS
In Order to use the image in this tutorial you MUST purchase it from PTE
PSP 9 (Any Version Will Work)
SCRAP KIT: Happy St Patrick Day From Rieka Rafita
MASK: Masker No 1 Patricia
TEMPLATE: Missy's Challenge Template
FONT: PassionsConflictROB
Okay Lets Begin!
Open new canvas 550X550
Paste paper 15 as a new layer.
Activate your mask
Go to load/save mask
Load mask from disk
Find your mask and click load.
Open your template paste them one by one.
Colorize to your liking with the paper of your choice.
Paste a tube of your choice as a new layer.
Place to your liking then paste your elements as a new layer.
Elements are
banner 2
beer 1
boot
bottle
bow 1
clover bunch
clover chain 1
doodle
gold scatter
kiss me
potofgold
pipe
plate
ribbon 2
shamrockswirl
teddy
shamrock
sparkles
Pls resize to your liking.
Use my tag above as a guide.
I resize all my elements 30% to 50%
Dont forget to put drop shadow of choice to all layers.
Add your name and copyright info
Saved your tag as png.
You are done!
Thanks for trying my tutorial.
***Gorgeous Arie 2011***
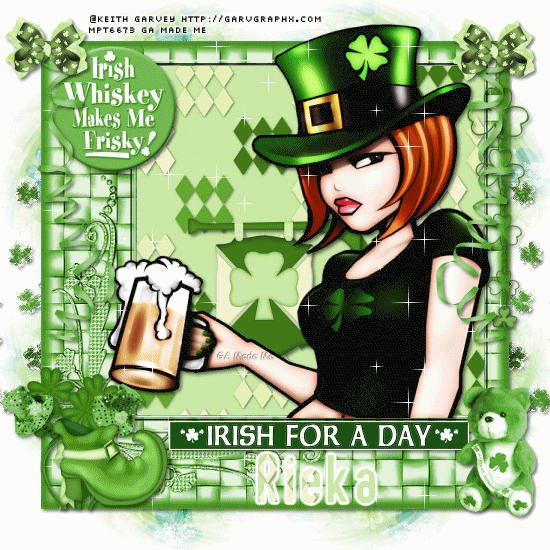
ARTWORK: Artist @ KEITH GARVEY
In Order to use the image in this tutorial you MUST purchase it from PTE
PSP 9 (Any Version Will Work)
SCRAP KIT: Happy St Patrick Day from Rieka Rafita
MASK: Masker Patricia no 1
TEMPLATE: Missy's Challenge template
FONT: Pixochrome
Okay Lets Begin!
Open new canvas 550X550
Paste paper 8 as a new layer.
Activate your mask
Go to load/save mask
Load mask from disk
Find your mask and click load.
Open your template paste them one by one.
Colorize to your liking with the paper of your choice.
Paste a tube of your choice as a new layer.
Place to your liking then paste your elements as a new layer.
Elements are
frame 2
wordart 1
button 1
clover chain 2
flag
ribbon 2
clover bunch
scarf
shamrock scatter
shoe 1
bow 3
teddy
Pls resize to your liking.
Use my tag above as a guide.
I resize all my elements to 50%
Dont forget to put drop shadow of choice to all layers.
Now will go for my animation sparkle thingy lol
Go to layer 2(mask) constellation setting 2.21 50 60 0 100 75 click ok
Go to layer 13 & 14(shamrockscatter) constellation click ok
Go to layer 3(frame) sparkle setting is 20
Go to layer 4(tube) sparkle click ok
First layer save them as tag1gif.
Go to layer 2(mask) xenofex click random seed 1x
Go to layer 13 & 14(shamrockscatter) constellation click ok
Go to layer 3(frame) sparkle setting is 25
Go to layer 4(tube) sparkle click ok
Second layer save them as tag2gif.
Go to layer 2(mask) constellation click random seed 1x
Go to layer 13 & 14(shamrockscatter) constellation click ok
Go to layer 3(frame) sparkle setting is 30
Go to layer 4(tube) sparkle click ok
Third layer save them as tag3gif.
Lastly open your tag view animation
Saved your tag as gif.
You are done!
Thanks for trying my tutorial.
***Gorgeous Arie 2011***
ARTWORK: Artist @ ELIAS CHATZOUDIS
In Order to use the image in this tutorial you MUST purchase it from PTE
PSP 9 (Any Version Will Work)
SCRAP KIT: Dreaming Of Spring from Danielle
MASK: Masker 1 Patricia
TEMPLATE: Tracy's Template no 46
FONT: P22 Corinthia
Okay Lets Begin!
Open new canvas 550X550
Paste paper 16 as a new layer.
Activate your mask
Go to load/save mask
Load mask from disk
Find your mask and click load.
Open your template paste them one by one.
Colorize to your liking with the paper of your choice.
Paste a tube of your choice as a new layer.
Place to your liking then paste your elements as a new layer.
Elements are
big bow
bikini
bird 1
buckle
butterfly with cicrcles
chrome bead frame 1
clouds and rain drops
decoration flower
dragon fly 1
frog 1
kite
lollipop 2
marker
popsickle
ribbon
love wordart
strawberry
sunglasses
watering plants
sparkles (not included in the kits)
Pls resize to your liking.
Use my tag above as a guide.
I resize all my elements to 30% to 50%
Dont forget to put drop shadow of choice to all layers.
Add your name and copyright info
You are done!
Thanks for trying my tutorial.
***Gorgeous Arie 2011***
ARTWORK: Artist @ LIX
In Order to use the image in this tutorial you MUST purchase it from PTE
PSP 9 (Any Version Will Work)
SCRAP KIT: Teen Love from Tammy Scraps
MASK: Masker 1 Patricia
TEMPLATE: Missy's Template No 377
FONT: P22 Corinthia
Okay Lets Begin!
Open new canvas 550X550
Paste paper 11 as a new layer.
Activate your mask
Go to load/save mask
Load mask from disk
Find your mask and click load.
Open your template paste them one by one.
Colorize to your liking with the paper of your choice.
Paste a tube of your choice as a new layer.
Place to your liking then paste your elements as a new layer.
Elements are
beads 3
bling 2
bling 6
bow 4
butterfly 3
cell phone 2
filmstrip 1
flower 6
frame book 1
gift box 2
heart bracket 2
wordart 1
heart charm 2
interlaced hearts 1
marker 2
ribbon 1
star dust 2
teddy bear 2
wodrart 3
sparkle 1
Dont forget to put drop shadow of choice to all layers.
Add your name and copyright info
You are done!
Thanks for trying my tutorial.
***Gorgeous Arie 2011***

ARTWORK: Artist @ ELIAS CHATZOUDIS
In Order to use the image in this tutorial you MUST purchase it from PTE
PSP 9 (Any Version Will Work)
SCRAP KIT: Gothic Bride from Rieka Rafita
MASK: Masker 2 Patricia
TEMPLATE: Missy's Template no 380
FONT: PassionsConflictROB
Okay Lets Begin!
Open new canvas 550X550
Paste paper 10 as a new layer.
Activate your mask
Go to load/save mask
Load mask from disk
Find your mask and click load.
Open your template paste them one by one.
Colorize to your liking with the paper of your choice.
Paste a tube of your choice as a new layer.
Place to your liking then paste your elements as a new layer.
Elements are
bell
book
bow 2
butterfly 2
champagne bottle & glass
doodle 3
flower 2
frames 4
glitter splash
lipstick
ribbon 3
skull bride
symbol
trellisarch
dove
shoe
rose chain
key
love charm
blinks
Pls resize to your liking.
Use my tag above as a guide.
I resize all my elements to 30% to 50%
Dont forget to put drop shadow of choice to all layers.
Add your name and copyright info
You are done!
Thanks for trying my tutorial.
***Gorgeous Arie 2011***
ARTWORK: Artist @ LADYMISHKA
In Order to use the image in this tutorial you MUST purchase it from PTE
PSP 9 (Any Version Will Work)
SCRAP KIT: Funklicious from Alikas
MASK: Masker 1 Patricia
TEMPLATE: Tracy's Template no 23
FONT: P22 Corinthia
Okay Lets Begin!
Open new canvas 550X550
Paste paper 3 as a new layer.
Activate your mask
Go to load/save mask
Load mask from disk
Find your mask and click load.
Open your template paste them one by one.
Colorize to your liking with the paper of your choice.
Paste a tube of your choice as a new layer.
Place to your liking then paste your elements as a new layer.
Elements are
as04
as07
as10
as18
as22
as23
as29
as32
as40
as44
as47
as55
as56
as60
sparkles (not included in the kits)
Pls resize to your liking.
Use my tag above as a guide.
I resize all my elements to 30% to 50%
Dont forget to put drop shadow of choice to all layers.
Add your name and copyright info
You are done!
Thanks for trying my tutorial.
***Gorgeous Arie 2011***
i made this tag using minxy's template challenge in her forum creative misfits and also kits are from rieka's rafita called cute lil emo.i love the colors and also turn out to be pink lol

ARTWORK: Artist @ ELIAS CHATZOUDIS
In Order to use the image in this tutorial you MUST purchase it from PTE
PSP 9 (Any Version Will Work)
SCRAP KIT: Secret Garden From Rieka Rafita
MASK: Vix mask gbss0901
TEMPLATE: Missy's Challenge Template
FONT: TK Doodle
Okay Lets Begin
Open new canvas 550X550
Paste paper 2 as a new layer.
Activate your mask
Go to load/save mask
Load mask from disk
Find your mask and click load.
Open your template paste them one by one.
Colorize to your liking with the paper of your choice.
Paste a tube of your choice as a new layer.
Place to your liking then paste your elements as a new layer.
Elements are
backward brad
banner
birdbath
bow 2
bubbles
bugs
butterfly
fence
flower 1
flower 2
chair
bicycle
bird
broom
bucket
gate
hat
ribbon 2
ribbon 3
wood chair
sparkles
Pls resize to your liking.
Use my tag above as a guide.
I resize all my elements 30% to 50%
Dont forget to put drop shadow of choice to all layers.
Add your name and copyright info
Saved your tag as png.
You are done!
Thanks for trying my tutorial.
***Gorgeous Arie 2011***
Lovely freebies kits from rieka called best family friends lol awesome honey as always u may take a peep at her blog HERE
ARTWORK: Artist @ ELIAS CHATZOUDIS
In Order to use the image in this tutorial you MUST purchase it from PTE
PSP 9 (Any Version Will Work)
SCRAP KIT: Sweet Tarts from Danielle
MASK: Sandra mask no 2
TEMPLATE: Missy's Challenge template
FONT: PassionConflictROB
Okay Lets Begin!
Open new canvas 550X550
Paste paper 15 as a new layer.
Activate your mask
Go to load/save mask
Load mask from disk
Find your mask and click load.
Open your template paste them one by one.
Colorize to your liking with the paper of your choice.
Paste a tube of your choice as a new layer.
Place to your liking then paste your elements as a new layer.
Elements are
valentines teddy with bow
valentines mail box
love word art
heart tree
heart on string 2
heart chicilare box
heart branch
frog i love you
butterfly 2
bow 2
heart arrow
Pls resize to your liking.
Use my tag above as a guide.
I resize all my elements to 50%
Dont forget to put drop shadow of choice to all layers.
Now will go for my animation sparkle thingy lol
Go to layer 9(tree) constellation setting 2.21 50 60 0 100 75 click ok
Go to layer 6(mailbox) adjust noise gaussian setting is 40 sparkle is 20
Go to layer 4(tube) sparkle click ok
First layer save them as tag1gif.
Go to layer 9(tree) xenofex click random seed 1x
Go to layer 6(mail box) adjust noise gaussian setting is 35 sparkle is 25
Go to layer 4(tube) sparkle click ok
Second layer save them as tag2gif.
Go to layer 9(tree) xenofex click random seed 1x
Go to layer 6(mail box) adjust noise gaussian setting is 30 sparkle is 30
Go to layer 4(tube) sparkle click ok
Third layer save them as tag3gif.
Lastly open your tag view animation
Saved your tag as gif.
You are done!
Thanks for trying my tutorial.
***Gorgeous Arie 2011***
ARTWORK: Artist @ LADY MISHKA
In Order to use the image in this tutorial you MUST purchase it from PICSFORDESIGN.COM
PSP 9 (Any Version Will Work)
SCRAP KIT: Punkilicious from Rieka Rafita
MASK: Aqua Mask no 016
TEMPLATE: Missy's Template no 378
FONT: PassionsConflictROB
Okay Lets Begin!
Open new canvas 550X550
Paste paper 3 as a new layer.
Activate your mask
Go to load/save mask
Load mask from disk
Find your mask and click load.
Open your template paste them one by one.
Colorize to your liking with the paper of your choice.
Paste a tube of your choice as a new layer.
Place to your liking then paste your elements as a new layer.
Elements are
banner
bag
bow 1
button 2
cupcakes skull
film strip
frame 5
pin
sad bunny 1
shoes 1
skull 1
sperinkle
wire 1
wire 2
doodlestring
bottlecap
ribbon 3
Pls resize to your liking.
Use my tag above as a guide.
I resize all my elements to 30% to 50%
Dont forget to put drop shadow of choice to all layers.
Add your name and copyright info
Some are doing different way this is how i did for my animation
:)
Go to layer 1(mask) constellation 2.20 50 60 0 100 75 click ok
Go to layer 11&12(film strip) click ok
Go to layer 13(frame) adjust add noise gaussian 40 click ok
Go to layer square 3 vm sparkle max size 20 click ok
Go to layer 4(bag) adjust noise gaussian click ok then vm sparkle click ok
Go to layer 2(tube) vm sparkle click ok
First layer save them as tag1gif.
now do it again the same method but changing the number of the size :)
Go to layer 1(mask) costellation click random seed 1x
Go to layer 11&12(film strip)click ok
Go to layer 13(frame) adjust add noise gaussian 35 click ok
Go to layer square 3 vm sparkle max size 25 click ok
Go to layer 4(bag) adjust noise gaussian click ok then vm sparkle click ok
Go to layer 2(tube) vm sparkle click ok
Second layer save them as tag2gif.
now do it again the same method i did only 3 layers to make my tags sparkle :)
Go to layer 1(mask) constellation click random seed 1x
Go to layer 11&12(film strip)click ok
Go to layer 13(frame) adjust add noise gaussian 30 click ok
Go to layer square 3 vm sparkle max size 20 click ok
Go to layer 4(bag) adjust noise gaussian cick ok then vm sparkle click ok
Go to layer 2(tube) vm sparkle click ok
Third layer saved them as tag3gif.
Lastly open yr jasc animation
Open yr tag1gif,tag2gif,tag3gif
Then view animation
Saved them as gif.
You are done!
Thanks for trying my tutorial.
***Gorgeous Arie 2011***
ARTWORK: Artist @ ELIAS CHATZOUDIS
In Order to use the image in this tutorial you MUST purchase it from PTE
PSP 9 (Any Version Will Work)
SCRAP KIT: Punkilicious from Rieka Rafita
MASK: Sandra Mask no 2
TEMPLATE: Missy's Template Challenge
FONT: P22 Corinthia
Okay Lets Begin!
Open new canvas 550X550
Paste paper 9 as a new layer.
Activate your mask
Go to load/save mask
Load mask from disk
Find your mask and click load.
Open your template paste them one by one.
Colorize to your liking with the paper of your choice.
Paste a tube of your choice as a new layer.
Place to your liking then paste your elements as a new layer.
Elements are
doodlestring
flower 1
glittersplat
ribbon 3
skull 1
cupcakes skull
rope
splatter
ribbon eyelet
banner
binder clip
bow 2
sparkle 1
Dont forget to put drop shadow of choice to all layers.
Add your name and copyright info
You are done!
Thanks for trying my tutorial.
***Gorgeous Arie 2011***
ARTWORK: Artist @ ELIAS CHATZOUDIS
In Order to use the image in this tutorial you MUST purchase it from MPT
PSP 9 (Any Version Will Work)
SCRAP KIT: Devoted From Alikas
MASK: Vix mask no 232
TEMPLATE: Missy's Template
FONT: P22 Conrinthia
Okay Lets Begin!
Open new canvas 550X550
Paste paper 10 as a new layer.
Activate your mask
Go to load/save mask
Load mask from disk
Find your mask and click load.
Open your template paste them one by one.
Colorize to your liking with the paper of your choice.
Paste a tube of your choice as a new layer.
Place to your liking then paste your elements as a new layer.
Elements are
as02
as03
as07
as08
as14
as16
as19
as26
as42
as45
as50
as63
as22
as68
as21
sparkle(not included in the kits)
Pls resize to your liking.
Use my tag above as a guide.
I resize all my elements 30% to 50%
Dont forget to put drop shadow of choice to all layers.
Add your name and copyright info
Saved your tag as png.
You are done!
Thanks for trying my tutorial.
***Gorgeous Arie 2011***
I create this tag using Kittz kits called my crazy valentine she got so pretty colors kit in it lol i am so loving it.u may take a peep at her blog HERE

ARTWORK: Artist @ ELIAS CHATZOUDIS
In Order to use the image in this tutorial you MUST purchase it from MPT
PSP 9 (Any Version Will Work)
SCRAP KIT: Love Bug from Tammy
MASK: Sandra Mask no 2
TEMPLATE: Missy's Template
FONT: Alex Brush
Okay Lets Begin!
Open new canvas 550X550
Paste paper 8 as a new layer.
Activate your mask
Go to load/save mask
Load mask from disk
Find your mask and click load.
Open your template paste them one by one.
Colorize to your liking with the paper of your choice.
Paste a tube of your choice as a new layer.
Place to your liking then paste your elements as a new layer.
Elements are
roses gift box 2
roses 4
puppy 1
love bug bear 1
interlaced hearts 1
hearts & swirls 1
heart ribbon 1
heart lollipop 1
heart frame 1
heart box with bear 2
fuzzy handcuffs 2
champagne gift box 1
candy box 3
bubbles 4
beaded heart 2
balloon 2
bag 3
arch 2
iloveyou basket 2
baby cupid 2
sparkle (not included in the kits)
Pls resize to your liking.
Use my tag above as a guide.
I resize all my elements to 30% to 50%
Dont forget to put drop shadow of choice to all layers.
Add your name and copyright info
You are done!
Thanks for trying my tutorial.
***Gorgeous Arie 2011***


