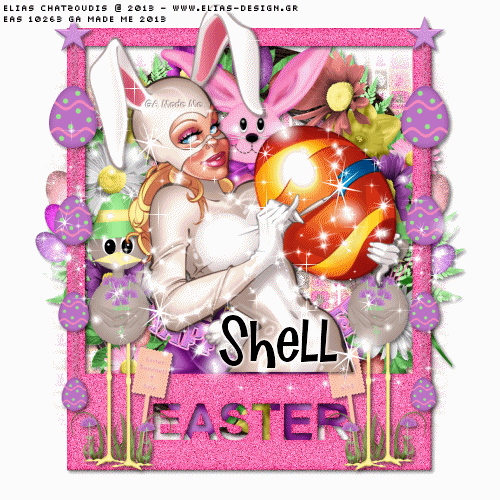
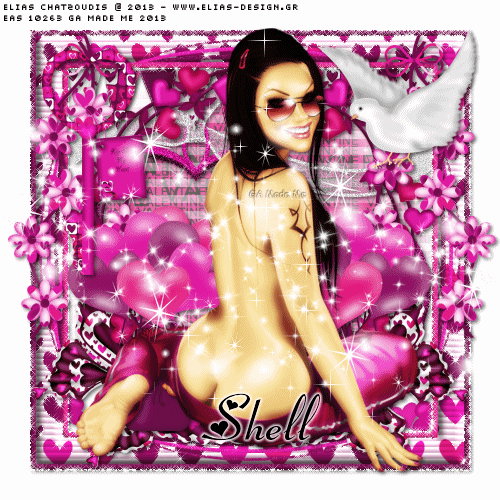
ARTWORK: Artist @ ELIAS CHATZOUDIS
In Order to use the image in this tutorial you MUST purchase it from EAS
PSP 9 (Any Version Will Work)
SCRAP KIT: Bunnylicious from Shell
MASK: wsl mask no 194
TEMPLATE: no template
FONT: snoppy snails NF
Okay Lets Begin!
Open new canvas 500X500
Paste paper 2 as a new layer.
Activate your mask
Go to load/save mask
Load mask from disk
Find your mask and click load.
Open your frame 1.
Paste them one by one.
Colorize to your liking with the paper of your choice.
Paste a tube of your choice as a new layer.
Place to your liking then paste your elements as a new layer.
Elements are
frame 1
egg chain 1
wreath 1
chicken 1
my sparkle
Pls resize to your liking.
Use my tag above as a guide.
I resize all my elements to 30%-50%
Dont forget to put drop shadow of choice to all layers.
Add your name and copyright info
Now will go for my animation sparkle thingy lol
Go to layer 2(mask) add noise gaussian click 40 click ok
Go to layer 3(frame) add noise gaussian click ok
Go to layer 4(tube) sparkle setting is 20
First layer save them as tag1gif.
Go to layer 2(mask) add noise gaussian click 35 click ok
Go to layer 3(frame) add noise gaussian click ok
Go to layer 4(tube) sparkle setting is 25
Second layer save them as tag2gif.
Go to layer 2(mask) add noise gaussian click 30 click ok
Go to layer 3(frame) add noise gaussian click ok
Go to layer 4(tube) sparkle setting is 30
Third layer save them as tag3gif.
Lastly open your tag view animation
Saved your tag as gif.
You are done!
Thanks for trying my tutorial.
***Gorgeous Arie 2013***
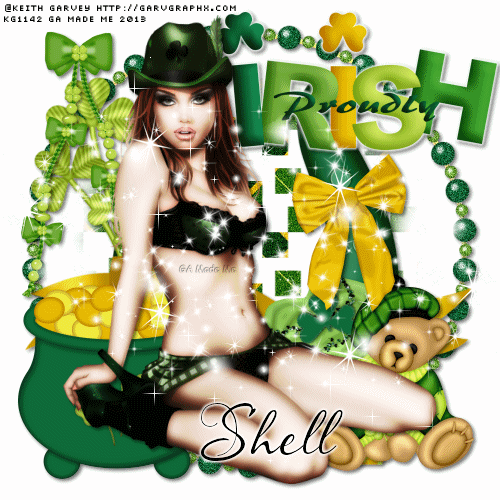
ARTWORK: Artist @ KEITH GARVEY
In Order to use the image in this tutorial you MUST purchase it from GARV
PSP 9 (Any Version Will Work)
SCRAP KIT: stpattysbeauty from Shell
MASK: wsl mask no 200
TEMPLATE: no template
FONT: Aquarelle
Okay Lets Begin!
Open new canvas 550X550
Paste paper 3 as a new layer.
Activate your mask
Go to load/save mask
Load mask from disk
Find your mask and click load.
Open your frame 1.
Paste them one by one.
Colorize to your liking with the paper of your choice.
Paste a tube of your choice as a new layer.
Place to your liking then paste your elements as a new layer.
Elements are
frame 1
horseshoe 1
wordart 3
beadedrope 1
potofgold 3
cupcake 2
stpattybear 2
bow 2
my sparkle
Pls resize to your liking.
Use my tag above as a guide.
I resize all my elements to 30%-50%
Dont forget to put drop shadow of choice to all layers.
Add your name and copyright info
Now will go for my animation sparkle thingy lol
Go to layer 2(mask) add noise gaussian click 40 click ok
Go to layer 3(frame) add noise gaussian click ok
Go to layer 5(tube) sparkle setting is 20
First layer save them as tag1gif.
Go to layer 2(mask) add noise gaussian click 35 click ok
Go to layer 3(frame) add noise gaussian click ok
Go to layer 5(tube) sparkle setting is 25
Second layer save them as tag2gif.
Go to layer 2(mask) add noise gaussian click 30 click ok
Go to layer 3(frame) add noise gaussian click ok
Go to layer 5(tube) sparkle setting is 30
Third layer save them as tag3gif.
Lastly open your tag view animation
Saved your tag as gif.
You are done!
Thanks for trying my tutorial.
***Gorgeous Arie 2013***
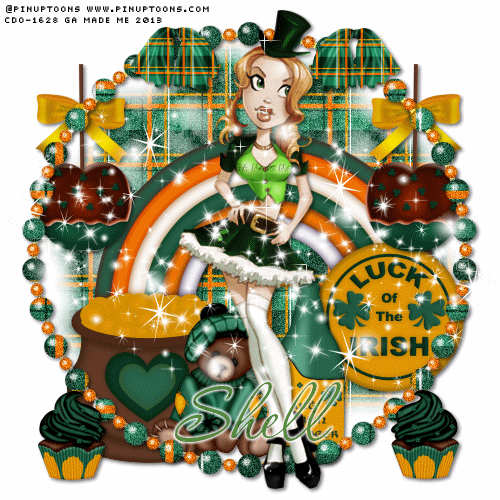
ARTWORK: Artist @ PINUPTOONS
In Order to use the image in this tutorial you MUST purchase it from CDO
PSP 9 (Any Version Will Work)
SCRAP KIT: Irish Proud from Shell
MASK: wsl mask no 134
TEMPLATE: no template
FONT: P22 Corinthia
Okay Lets Begin!
Open new canvas 500X500
Paste paper 5 as a new layer.
Activate your mask
Go to load/save mask
Load mask from disk
Find your mask and click load.
Open your frame 2.
Paste them one by one.
Colorize to your liking with the paper of your choice.
Paste a tube of your choice as a new layer.
Place to your liking then paste your elements as a new layer.
Elements are
frame 2
potofgold 2
candy apple 1
teddy 1
irish beer 1
bow 1
cupcake 1
my sparkle
Pls resize to your liking.
Use my tag above as a guide.
I resize all my elements to 30%-50%
Dont forget to put drop shadow of choice to all layers.
Add your name and copyright info
Now will go for my animation sparkle thingy lol
Go to layer 2(mask) add noise gaussian click 40 click ok
Go to layer 3(frame) add noise gaussian click ok
Go to layer 4(tube) sparkle setting is 20
First layer save them as tag1gif.
Go to layer 2(mask) add noise gaussian click 35 click ok
Go to layer 3(frame) add noise gaussian click ok
Go to layer 4(tube) sparkle setting is 25
Second layer save them as tag2gif.
Go to layer 2(mask) add noise gaussian click 30 click ok
Go to layer 3(frame) add noise gaussian click ok
Go to layer 4(tube) sparkle setting is 30
Third layer save them as tag3gif.
Lastly open your tag view animation
Saved your tag as gif.
You are done!
Thanks for trying my tutorial.
***Gorgeous Arie 2013***
ARTWORK: Artist @ ELIAS CHATZOUDIS
In Order to use the image in this tutorial you MUST purchase it from EAS
PSP 9 (Any Version Will Work)
SCRAP KIT: Valentine Plum from Shell
MASK: wsl mask no 12
TEMPLATE: no template
FONT: Fiolex Girls
Okay Lets Begin!
Open new canvas 500X500
Paste paper 8 as a new layer.
Activate your mask
Go to load/save mask
Load mask from disk
Find your mask and click load.
Open your frame 1.
Paste them one by one.
Colorize to your liking with the paper of your choice.
Paste a tube of your choice as a new layer.
Place to your liking then paste your elements as a new layer.
Elements are
frame 1
heart string 2
heart 2
banner 2
flower string 1
air balloon 1
dove 1
key 1
heartwreath 1
butterfly 1
my sparkle
Pls resize to your liking.
Use my tag above as a guide.
I resize all my elements to 30%-50%
Dont forget to put drop shadow of choice to all layers.
Add your name and copyright info
Now will go for my animation sparkle thingy lol
Go to layer 3(frame) constellation 2.21 50 60 100 76 click ok
Go to layer 5(love) add noise gaussian click 40 click ok
Go to layer 6(tube) sparkle setting is 20
First layer save them as tag1gif.
Go to layer 3(frame) constellation click randoom seed click ok
Go to layer 5(love) add noise gaussian click 35 click ok
Go to layer 6(tube) sparkle setting is 25
Second layer save them as tag2gif.
Go to layer 3(frame) constellation click randoom seed click ok
Go to layer 5(love) add noise gaussian click 30 click ok
Go to layer 6(tube) sparkle setting is 30
Third layer save them as tag3gif.
Lastly open your tag view animation
Saved your tag as gif.
You are done!
Thanks for trying my tutorial.
***Gorgeous Arie 2013***
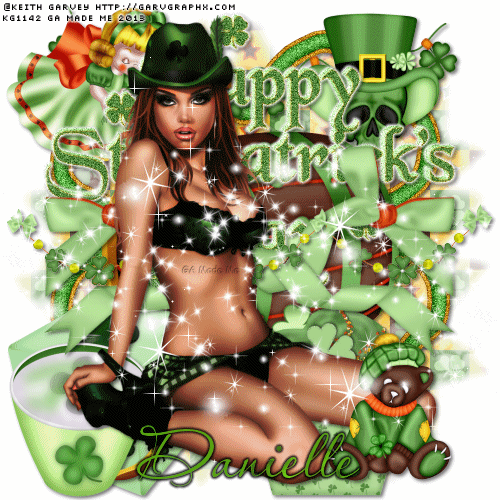
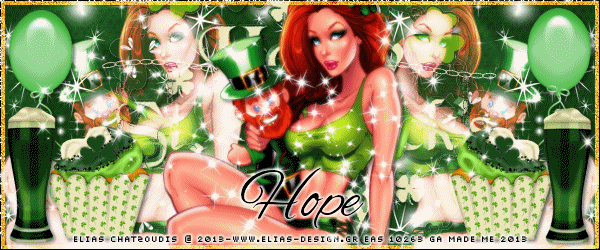
ARTWORK: Artist @ KEITH GARVEY
In Order to use the image in this tutorial you MUST purchase it from GARV
PSP 9 (Any Version Will Work)
SCRAP KIT: Clover Kisses from Danielle
MASK: rieka mask no 4
TEMPLATE: no template
FONT: Aquarelle
Okay Lets Begin!
Open new canvas 500X500
Paste paper 3 as a new layer.
Activate your mask
Go to load/save mask
Load mask from disk
Find your mask and click load.
Open your shamrock frame 2.
Paste them one by one.
Colorize to your liking with the paper of your choice.
Paste a tube of your choice as a new layer.
Place to your liking then paste your elements as a new layer.
Elements are
shamrock frame 2
clovers on a rope
bow
happy st patricks day wordart
clover dice
shamrock cupcake
clover girl
skull with shamrocks
shamrock lights
irish wisky
shamrock mug
st patricks day bear
my sparkle
Pls resize to your liking.
Use my tag above as a guide.
I resize all my elements to 30%-50%
Dont forget to put drop shadow of choice to all layers.
Add your name and copyright info
Now will go for my animation sparkle thingy lol
Go to layer 2(mask) add noise gaussian click 40 click ok
Go to layer 3(frame) add noise gaussian click ok
Go to layer 4(tube) sparkle setting is 20
First layer save them as tag1gif.
Go to layer 2(mask) add noise gaussian click 35 click ok
Go to layer 3(frame) add noise gaussian click ok
Go to layer 4(tube) sparkle setting is 25
Second layer save them as tag2gif.
Go to layer 2(mask) add noise gaussian click 30 click ok
Go to layer 3(frame)add noise gaussian click ok
Go to layer 4(tube) sparkle setting is 30
Third layer save them as tag3gif.
Lastly open your tag view animation
Saved your tag as gif.
You are done!
Thanks for trying my tutorial.
***Gorgeous Arie 2013***
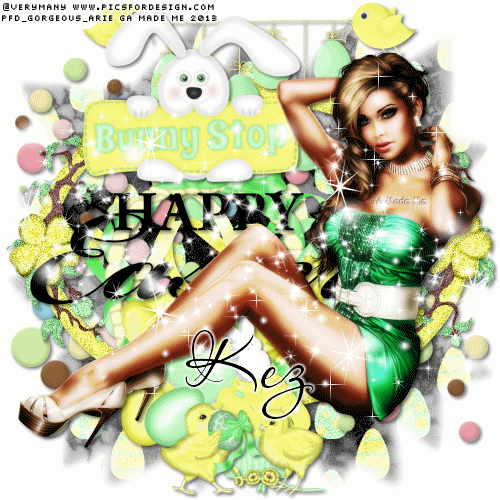
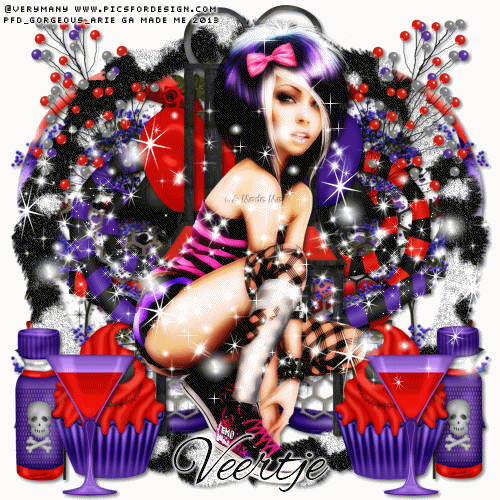
ARTWORK: Artist @ VERYMANY
In Order to use the image in this tutorial you MUST purchase it from PICSFORDESIGN.COM
PSP 9 (Any Version Will Work)
SCRAP KIT: Mellow Yellow Easter from Kez
MASK: rieka mask no 4
TEMPLATE: no template
FONT: Aquarelle
Okay Lets Begin!
Open new canvas 500X500
Paste paper 10 as a new layer.
Activate your mask
Go to load/save mask
Load mask from disk
Find your mask and click load.
Open your frame.
Paste them one by one.
Colorize to your liking with the paper of your choice.
Paste a tube of your choice as a new layer.
Place to your liking then paste your elements as a new layer.
Elements are
F3
E10
E11
E19
E22
E32
E33
E26
E9
E29
my sparkle
Pls resize to your liking.
Use my tag above as a guide.
I resize all my elements to 30%-50%
Dont forget to put drop shadow of choice to all layers.
Add your name and copyright info
Now will go for my animation sparkle thingy lol
Go to layer 2(mask) add noise gaussian click 40 click ok
Go to layer 3(frame) add noise gaussian click ok
Go to layer 4(tube) sparkle setting is 20
First layer save them as tag1gif.
Go to layer 2(mask) add noise gaussian click 35 click ok
Go to layer 3(frame) add noise gaussian click ok
Go to layer 4(tube) sparkle setting is 25
Second layer save them as tag2gif.
Go to layer 2(mask) add noise gaussian click 30 click ok
Go to layer 3(frame)add noise gaussian click ok
Go to layer 4(tube) sparkle setting is 30
Third layer save them as tag3gif.
Lastly open your tag view animation
Saved your tag as gif.
You are done!
Thanks for trying my tutorial.
***Gorgeous Arie 2013***
ARTWORK: Artist @ KEITH GARVEY
In Order to use the image in this tutorial you MUST purchase it from GARV
PSP 9 (Any Version Will Work)
SCRAP KIT: Fright Delight from Shell
MASK: rieka mask no 5
TEMPLATE: no template
FONT: P22 Corinthia
Okay Lets Begin!
Open new canvas 550X550
Paste paper 2 as a new layer.
Activate your mask
Go to load/save mask
Load mask from disk
Find your mask and click load.
Open your frame 1.
Paste them one by one.
Colorize to your liking with the paper of your choice.
Paste a tube of your choice as a new layer.
Place to your liking then paste your elements as a new layer.
Elements are
frame 1
haunted house
bag 3
boo
brew 1
ribbon 1
skull 1
spider 2
witch 3
flower 1
pumpkin head
cupcake 2
poison 1
cat 1
broom 1
my sparkle
Pls resize to your liking.
Use my tag above as a guide.
I resize all my elements 30% to 50%
Dont forget to put drop shadow of choice to all layers.
Add your name and copyright info
Saved your tag as png.
You are done!
Thanks for trying my tutorial.
***Gorgeous Arie 2013***
ARTWORK: Artist @ ELIAS CHATZOUDIS
In Order to use the image in this tutorial you MUST purchase it from EAS
PSP 9 (Any Version Will Work)
SCRAP KIT: Tricky or Treats from Shell
MASK: rieka mask no 4
TEMPLATE: no template
FONT: Aquarelle
Okay Lets Begin!
Open new canvas 550X550
Paste paper 8 as a new layer.
Activate your mask
Go to load/save mask
Load mask from disk
Find your mask and click load.
Open your frame 1.
Paste them one by one.
Colorize to your liking with the paper of your choice.
Paste a tube of your choice as a new layer.
Place to your liking then paste your elements as a new layer.
Elements are
frame 1
flag 1
cushion 1
halloween cake 4
cat 1
ghost 1
halloween drink 2
halloween pops 1
batlolly 1
my sparkle
Pls resize to your liking.
Use my tag above as a guide.
I resize all my elements 30% to 50%
Dont forget to put drop shadow of choice to all layers.
Add your name and copyright info
Saved your tag as png.
You are done!
Thanks for trying my tutorial.
***Gorgeous Arie 2013***
Pretty kits by the names of Kiss My... lol View HERE tysm hugs xoxo
ARTWORK: Artist @ ELIAS CHATZOUDIS
In Order to use the image in this tutorial you MUST purchase it from EAS
PSP 9 (Any Version Will Work)
SCRAP KIT: Bewitching from Krissy
MASK: aqua mask no 16
TEMPLATE: no template
FONT: Valentina.JF
Okay Lets Begin!
Open new canvas 550X550
Paste paper 7 as a new layer.
Activate your mask
Go to load/save mask
Load mask from disk
Find your mask and click load.
Open your circle plaid frame 2.
Paste them one by one.
Colorize to your liking with the paper of your choice.
Paste a tube of your choice as a new layer.
Place to your liking then paste your elements as a new layer.
Elements are
circle plaid frame 2
spider web 1
spooky tree 1
name plate 1-creepy
name plate 3-bewitch
candy stick 2-witch
cheeky bow 4
ghost 1
witchy cat 1
my sparkle
Pls resize to your liking.
Use my tag above as a guide.
I resize all my elements 30% to 50%
Dont forget to put drop shadow of choice to all layers.
Add your name and copyright info
Saved your tag as png.
You are done!
Thanks for trying my tutorial.
***Gorgeous Arie 2013***
ARTWORK: Artist @ ELIAS CHATZOUDIS
In Order to use the image in this tutorial you MUST purchase it from EAS
PSP 9 (Any Version Will Work)
SCRAP KIT: Love Sucks from Danielle
MASK: WSL mask no 17
TEMPLATE: no template
FONT: Snaggle Puss
Okay Lets Begin!
Open new canvas 550X550
Paste paper 5 as a new layer.
Activate your mask
Go to load/save mask
Load mask from disk
Find your mask and click load.
Open your bone frame.
Paste them one by one.
Colorize to your liking with the paper of your choice.
Paste a tube of your choice as a new layer.
Place to your liking then paste your elements as a new layer.
Elements are
bone frame
love sucks word art
skull key chain
cross with heart and barbed wire
hand cuffs
skull candle
pill
needle
knife
boxing gloves
my sparkle
Pls resize to your liking.
Use my tag above as a guide.
I resize all my elements 30% to 50%
Dont forget to put drop shadow of choice to all layers.
Add your name and copyright info
Saved your tag as png.
You are done!
Thanks for trying my tutorial.
***Gorgeous Arie 2013***