ARTWORK: Artist @ ALEX PRIHODKO
In Order to use the image in this tutorial you MUST purchase it from PICSFORDESIGN.COM
PSP 9 (Any Version Will Work)
SCRAP KIT: Angel Eyes from Hania
MASK: vix mask no 236
TEMPLATE: no template
FONT: P22 Corinthia
Okay Lets Begin!
Open new canvas 550X550
Paste paper 5 as a new layer.
Activate your mask
Go to load/save mask
Load mask from disk
Find your mask and click load.
Open your black frame.
Paste them one by one.
Colorize to your liking with the paper of your choice.
Paste a tube of your choice as a new layer.
Place to your liking then paste your elements as a new layer.
Elements are
100
22
13
6
9
11
14
33
46
57
70
86
77
34
69
19
93
my sparkle
Pls resize to your liking.
Use my tag above as a guide.
I resize all my elements 30% to 50%
Dont forget to put drop shadow of choice to all layers.
Add your name and copyright info
Saved your tag as png.
You are done!
Thanks for trying my tutorial.
***Gorgeous Arie 2013***

ARTWORK: Artist @ JOSE A CANO
In Order to use the image in this tutorial you MUST purchase it from SATC
PSP 9 (Any Version Will Work)
SCRAP KIT: Sea Adventures from Danielle
MASK: Vix mask no 232
TEMPLATE: template missy no 379
FONT: Aquarelle
Okay Lets Begin!
Open new canvas 550X550
Paste paper 1 as a new layer.
Activate your mask
Go to load/save mask
Load mask from disk
Find your mask and click load.
Open your template.
Paste them one by one.
Colorize to your liking with the paper of your choice.
Paste a tube of your choice as a new layer.
Place to your liking then paste your elements as a new layer.
Elements are
net
bell flower lights
eyelet ribbon
chair
light house
message in the bottle
starfish
sun
relax wordart
tiki mask
octopus
crab
jellyfish
my sparkle
Pls resize to your liking.
Use my tag above as a guide.
I resize all my elements 30% to 50%
Dont forget to put drop shadow of choice to all layers.
Add your name and copyright info
Saved your tag as png.
You are done!
Thanks for trying my tutorial.
***Gorgeous Arie 2013***

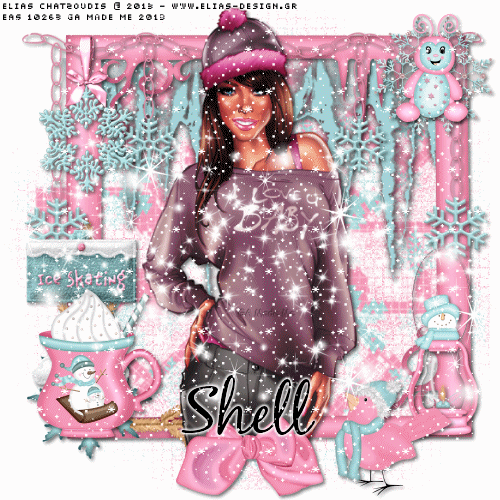
ARTWORK: Artist @ ELIAS CHATZOUDIS
In Order to use the image in this tutorial you MUST purchase it from EAS
PSP 9 (Any Version Will Work)
SCRAP KIT: Mando from Hania
MASK: vix mask no 245
TEMPLATE: missy's template no 377
FONT: Aquarelle
Okay Lets Begin!
Open new canvas 550X550
Paste paper 2 as a new layer.
Activate your mask
Go to load/save mask
Load mask from disk
Find your mask and click load.
Open your frame.
Paste them one by one.
Colorize to your liking with the paper of your choice.
Paste a tube of your choice as a new layer.
Place to your liking then paste your elements as a new layer.
Elements are
106
18
63
9
15
21
17
59
60
64
97
75
96
my sparkle
Pls resize to your liking.
Use my tag above as a guide.
I resize all my elements 30% to 50%
Dont forget to put drop shadow of choice to all layers.
Add your name and copyright info
Saved your tag as png.
You are done!
Thanks for trying my tutorial.
***Gorgeous Arie 2013***

ARTWORK: Artist @ VERYMANY
In Order to use the image in this tutorial you MUST purchase it from PICSFORDESIGN.COM
PSP 9 (Any Version Will Work)
SCRAP KIT: Emolicious from Danielle
MASK: Vix mask no 232
TEMPLATE: no template
FONT: P22 Corinthia
Okay Lets Begin!
Open new canvas 550X550
Paste paper 4 as a new layer.
Activate your mask
Go to load/save mask
Load mask from disk
Find your mask and click load.
Open your frame 1.
Paste them one by one.
Colorize to your liking with the paper of your choice.
Paste a tube of your choice as a new layer.
Place to your liking then paste your elements as a new layer.
Elements are
frame 1
emo word art
spider web pop
bomb with skull
emo ted
gum ball machine
emo cake
boot skull
emo skull with bow
emo teddy
my sparkle
Pls resize to your liking.
Use my tag above as a guide.
I resize all my elements 30% to 50%
Dont forget to put drop shadow of choice to all layers.
Add your name and copyright info
Saved your tag as png.
You are done!
Thanks for trying my tutorial.
***Gorgeous Arie 2013***

ARTWORK: Artist @ VERYMANY
In Order to use the image in this tutorial you MUST purchase it from PICSFORDESIGN.COM
PSP 9 (Any Version Will Work)
SCRAP KIT: Going Tropical from Danielle
MASK: Vix mask no 232
TEMPLATE: tracy template no 51
FONT: P22 Corinthia
Okay Lets Begin!
Open new canvas 550X550
Paste paper 11 as a new layer.
Activate your mask
Go to load/save mask
Load mask from disk
Find your mask and click load.
Open your template.
Paste them one by one.
Colorize to your liking with the paper of your choice.
Paste a tube of your choice as a new layer.
Place to your liking then paste your elements as a new layer.
Elements are
flower lights
surfboard
lemonade stand
flower flip flops
ipod
cherry cupcake
beach ball
lei
sunglasses
peppermint stick
star fish
my sparkle
Pls resize to your liking.
Use my tag above as a guide.
I resize all my elements 30% to 50%
Dont forget to put drop shadow of choice to all layers.
Add your name and copyright info
Saved your tag as png.
You are done!
Thanks for trying my tutorial.
***Gorgeous Arie 2013***

ARTWORK: Artist @ KEITH GARVEY
In Order to use the image in this tutorial you MUST purchase it from GARVGIRL
PSP 9 (Any Version Will Work)
SCRAP KIT: School Dayz from Danielle
MASK: Vix mask no 232
TEMPLATE: no template
FONT: P22 Corinthia
Okay Lets Begin!
Open new canvas 550X550
Paste paper 5 as a new layer.
Activate your mask
Go to load/save mask
Load mask from disk
Find your mask and click load.
Open your paper.
Paste them one by one.
Colorize to your liking with the paper of your choice.
Paste a tube of your choice as a new layer.
Place to your liking then paste your elements as a new layer.
Elements are
paper
school bus
school days word art
abcd letters
lunch box
milk shake
my teacher gets a A
school desk
rubicks cube
hot dog
marker
color palette
paper clip
eraser
glue bottle
scissors
calculator
my sparkle
Pls resize to your liking.
Use my tag above as a guide.
I resize all my elements 30% to 50%
Dont forget to put drop shadow of choice to all layers.
Add your name and copyright info
Saved your tag as png.
You are done!
Thanks for trying my tutorial.
***Gorgeous Arie 2013***