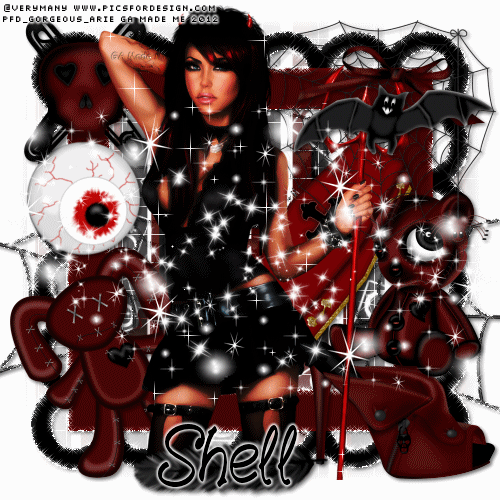
ARTWORK: Artist @ VERYMANY
In Order to use the image in this tutorial you MUST purchase it from PICSFORDESIGN.COM
PSP 9 (Any Version Will Work)
SCRAP KIT: Little Devil from Shell
MASK: Sandra mask no 2
TEMPLATE: NO TEMPLATE
FONT: Fountain Pen
Okay Lets Begin!
Open new canvas 500X500
Paste paper 7 as a new layer.
Activate your mask
Go to load/save mask
Load mask from disk
Find your mask and click load.
Open your frame paste them one by one.
Colorize to your liking with the paper of your choice.
Paste a tube of your choice as a new layer.
Place to your liking then paste your elements as a new layer.
Elements are
frame 2
web 1
spider 1
voodoobunny 1
skullpin 1
bow 2
bat 1
shoe 1
feather 1
coffin 1
eyeball 1
sad teddy 1
my sparkle
Dont forget to put drop shadow of choice to all layers.
Add your name and copyright info
Now will go for my animation sparkle thingy lol
Some are doing different way this is how i did for my animation
:)
Go to layer 3(frame) constellation 2.20 50 60 0 100 75 click ok
Go to layer 5(web spider) constellation click ok
Go to layer 4(tube) vm sparkle click no 20
First layer save them as tag1gif.
now do it again the same method but changing the number of the size :)
Go to layer 3(mask) constellation click random seed 1x
Go to layer 5(web spider) constellation click ok
Go to layer 4(tube) vm sparkle click no 25
Second layer save them as tag2gif.
Go to layer 3(mask) constellation click random seed 1x
Go to layer 5(web spider) constellation click ok
Go to layer 4(tube) vm sparkle click no 30
Third layer saved them as tag3gif.
Lastly open yr jasc animation
Open yr tag1gif,tag2gif,tag3gif
Then view animation
Saved them as gif.
You are done!
Thanks for trying my tutorial.
***Gorgeous Arie 2012***
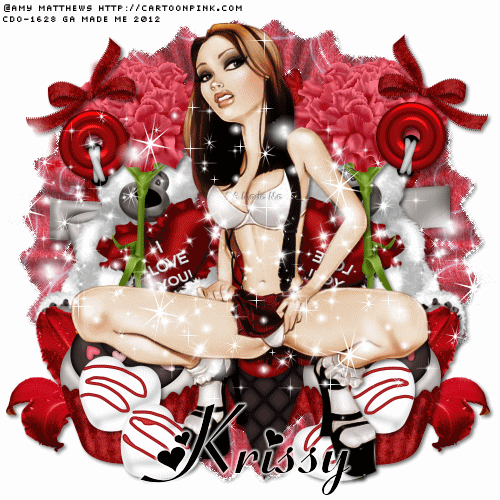
ARTWORK: Artist @ AMY MATTHEWS
In Order to use the image in this tutorial you MUST purchase it from CDO
PSP 9 (Any Version Will Work)
SCRAP KIT: Sticky Sweet from Krissy
MASK: Aqua mask no 24
TEMPLATE: no template
FONT: Fiolex Girls
Okay Lets Begin!
Open new canvas 500X500
Paste paper 7 as a new layer.
Activate your mask
Go to load/save mask
Load mask from disk
Find your mask and click load.
Open your frame paste them one by one.
Colorize to your liking with the paper of your choice.
Paste a tube of your choice as a new layer.
Place to your liking then paste your elements as a new layer.
Elements are
raffled frame 1
beaded heart 3
eyelet brad 1
realistic bloom 1
heart candy 1
heart topped cupcake 1
ribbon wrap 5
sweet bear 2
snow cone
carnahon 3
bowl 1
my sparkles
Pls resize to your liking.
Use my tag above as a guide.
I resize all my elements to 30% to 50%
Dont forget to put drop shadow of choice to all layers.
Add your name and copyright info
Now will go for my animation sparkle thingy lol
Some are doing different way this is how i did for my animation
:)
Go to layer 2(mask) constellation 2.20 50 60 0 100 75 click ok
Go to layer 3(frame) constellation click ok
Go to layer 4(tube) vm sparkle click no 20
First layer save them as tag1gif.
now do it again the same method but changing the number of the size :)
Go to layer 2(mask) constellation click random seed 1x
Go to layer 3(frame) constellation click ok
Go to layer 4(tube) vm sparkle click no 25
Second layer save them as tag2gif.
Go to layer 2(mask) constellation click random seed 1x
Go to layer 3(frame) constellation click ok
Go to layer 4(tube) vm sparkle click no 30
Third layer saved them as tag3gif.
Lastly open yr jasc animation
Open yr tag1gif,tag2gif,tag3gif
Then view animation
Saved them as gif.
You are done!
Thanks for trying my tutorial.
***Gorgeous Arie 2012***
ARTWORK: Artist @ ZLATA
In Order to use the image in this tutorial you MUST purchase it from TPP
PSP 9 (Any Version Will Work)
SCRAP KIT: Monster Lane from Danielle
MASK: Aqua mask no 16
TEMPLATE: NO TEMPLATE
FONT: Snoopy Snails NF
Okay Lets Begin!
Open new canvas 500X500
Paste paper 9 as a new layer.
Activate your mask
Go to load/save mask
Load mask from disk
Find your mask and click load.
Open your bone frame paste them one by one.
Colorize to your liking with the paper of your choice.
Paste a tube of your choice as a new layer.
Place to your liking then paste your elements as a new layer.
Elements are
bone frame
spider and ghost lights
spooky wordart
magic books with skulls
zombie girl
skeleton cat
spooky tree
monster 2
monster in coffin
spider
halloween hands
skull with bones
halloween cupcake
eye and hat
my sparkle
Dont forget to put drop shadow of choice to all layers.
Add your name and copyright info
You are done!
Thanks for trying my tutorial.
***Gorgeous Arie 2012***
hello lovely friends...i will be meeting my mother in law tomorrow till weekend i wont be online for a while.i hope everyone has a lovely day n be safe where ever you are. hugs xoxo
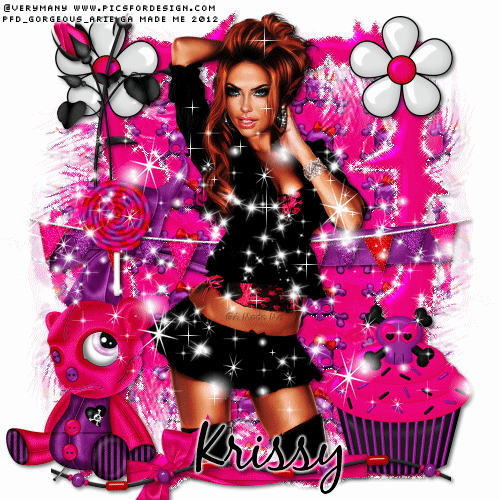
ARTWORK: Artist @ VERYMANY
In Order to use the image in this tutorial you MUST purchase it from PICSFORDESIGN.COM
PSP 9 (Any Version Will Work)
SCRAP KIT: Emoshun 1 From Krissy
MASK: WSL mask no 59
TEMPLATE: no template
FONT: Aquarelle
Okay Lets Begin!
Open new canvas 500X500
Paste paper 1 as a new layer.
Activate your mask
Go to load/save mask
Load mask from disk
Find your mask and click load.
Open your frame paste them one by one.
Colorize to your liking with the paper of your choice.
Paste a tube of your choice as a new layer.
Place to your liking then paste your elements as a new layer.
Elements are
frame 1
glossy flower 2
plain ribbon wrap 2
giant sucker 1
bunting 1
cupcake 1
dying rose bud 1
sad teddy 1
plain ribbon wrap 1
beaded string 2
my sparkles
Pls resize to your liking.
Use my tag above as a guide.
I resize all my elements to 30% to 50%
Dont forget to put drop shadow of choice to all layers.
Add your name and copyright info
Now will go for my animation sparkle thingy lol
Some are doing different way this is how i did for my animation
:)
Go to layer 2(mask) constellation 2.20 50 60 0 100 75 click ok
Go to layer 3(frame) constellation click ok
Go to layer 8(banner) add noise gaussian click no 40
Go to layer 4(tube) vm sparkle click no 20
First layer save them as tag1gif.
now do it again the same method but changing the number of the size :)
Go to layer 2(mask) constellation click random seed 1x
Go to layer 3(frame) constellation click ok
Go to layer 8(banner) add noise gaussian click no 35
Go to layer 4(tube) vm sparkle click no 25
Second layer save them as tag2gif.
Go to layer 2(mask) constellation click random seed 1x
Go to layer 3(frame) constellation click ok
Go to layer 8(banner) add noise gaussian click no 30
Go to layer 4(tube) vm sparkle click no 30
Third layer saved them as tag3gif.
Lastly open yr jasc animation
Open yr tag1gif,tag2gif,tag3gif
Then view animation
Saved them as gif.
You are done!
Thanks for trying my tutorial.
***Gorgeous Arie 2012***
ARTWORK: Artist @ VERYMANY
In Order to use the image in this tutorial you MUST purchase it from PICSFORDESIGN.COM
PSP 9 (Any Version Will Work)
SCRAP KIT: EmoGurl 3 from Shell
MASK: WSL mask no 62
TEMPLATE: NO TEMPLATE
FONT: Love
Okay Lets Begin!
Open new canvas 500X500
Paste paper 2 as a new layer.
Activate your mask
Go to load/save mask
Load mask from disk
Find your mask and click load.
Open your frame paste them one by one.
Colorize to your liking with the paper of your choice.
Paste a tube of your choice as a new layer.
Place to your liking then paste your elements as a new layer.
Elements are
frame 3
emo banner 1
emo chain 1
emo pop 1
emo wordart 1
lipgloss 1
poison bottle 1
emo bottlecap 4
skull chain 1
skull cupcake 2
my sparkle
Dont forget to put drop shadow of choice to all layers.
Add your name and copyright info
You are done!
Thanks for trying my tutorial.
***Gorgeous Arie 2012***
ARTWORK: Artist @ VERYMANY
In Order to use the image in this tutorial you MUST purchase it from PICSFORDESIGN.COM
PSP 9 (Any Version Will Work)
SCRAP KIT: EmoGurl 2 from Shell
MASK: WSL mask no 99
TEMPLATE: NO TEMPLATE
FONT: Love
Okay Lets Begin!
Open new canvas 500X500
Paste paper 3 as a new layer.
Activate your mask
Go to load/save mask
Load mask from disk
Find your mask and click load.
Open your frame paste them one by one.
Colorize to your liking with the paper of your choice.
Paste a tube of your choice as a new layer.
Place to your liking then paste your elements as a new layer.
Elements are
frame 3
spider 1
emo word art 1
emo chain 1
skull doodle 1
emo cat 1
emo cupcake 1
emo guitar 1
skull 4
my sparkle
Dont forget to put drop shadow of choice to all layers.
Add your name and copyright info
You are done!
Thanks for trying my tutorial.
***Gorgeous Arie 2012***
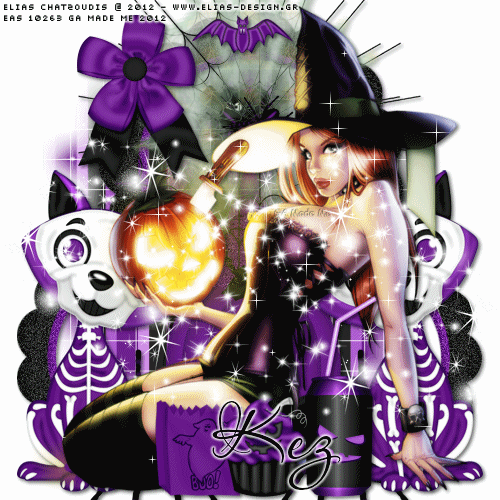
ARTWORK: Artist @ ELIAS CHATZOUDIS
In Order to use the image in this tutorial you MUST purchase it from EAS
PSP 9 (Any Version Will Work)
SCRAP KIT: Halloween Magic from Kez
MASK: WSL mask no 84
TEMPLATE: no template
FONT: Aquarelle
Okay Lets Begin!
Open new canvas 500X500
Paste paper 14 as a new layer.
Activate your mask
Go to load/save mask
Load mask from disk
Find your mask and click load.
Open your frame paste them one by one.
Colorize to your liking with the paper of your choice.
Paste a tube of your choice as a new layer.
Place to your liking then paste your elements as a new layer.
Elements are
frame 1
flower bow
pumpkin
skeleton cat
spider n web
spider n web 2
halloween can
pumpkin cake
purple bat
ghost bag
my sparkles
Pls resize to your liking.
Use my tag above as a guide.
I resize all my elements to 30% to 50%
Dont forget to put drop shadow of choice to all layers.
Add your name and copyright info
Now will go for my animation sparkle thingy lol
Some are doing different way this is how i did for my animation
:)
Go to layer 2(mask) constellation 2.20 50 60 0 100 75 click ok
Go to layer 3(frame) add noise gaussian click no 40
Go to layer 4(tube) vm sparkle click no 20
First layer save them as tag1gif.
now do it again the same method but changing the number of the size :)
Go to layer 2(mask) constellation click random seed 1x
Go to layer 3(frame) add noise gaussian click no 35
Go to layer 4(tube) vm sparkle click no 25
Second layer save them as tag2gif.
Go to layer 2(mask) constellation click random seed 1x
Go to layer 3(frame) add noise gaussian click no 30
Go to layer 4(tube) vm sparkle click 30
Third layer saved them as tag3gif.
Lastly open yr jasc animation
Open yr tag1gif,tag2gif,tag3gif
Then view animation
Saved them as gif.
You are done!
Thanks for trying my tutorial.
***Gorgeous Arie 2012***
ARTWORK: Artist @ ELIAS CHATZOUDIS
In Order to use the image in this tutorial you MUST purchase it from EAS
PSP 9 (Any Version Will Work)
SCRAP KIT: Halloween Magic from Kez
MASK: Aqua mask no 16
TEMPLATE: Missy & Rosey Collab no 4
FONT: Orator Std
Okay Lets Begin!
Open new canvas 500X500
Paste paper 1 as a new layer.
Activate your mask
Go to load/save mask
Load mask from disk
Find your mask and click load.
Open your template paste them one by one.
Colorize to your liking with the paper of your choice.
Paste a tube of your choice as a new layer.
Place to your liking then paste your elements as a new layer.
Elements are
flags
spider n web
trick or treat
pumpkin boy
candy house
lollipop 1
bow 1
ghost boy
black cat
bat
my sparkle
Dont forget to put drop shadow of choice to all layers.
Add your name and copyright info
You are done!
Thanks for trying my tutorial.
***Gorgeous Arie 2012***
ARTWORK: Artist @ ELIAS CHATZOUDIS
In Order to use the image in this tutorial you MUST purchase it from EAS
PSP 9 (Any Version Will Work)
SCRAP KIT: Trick Or Treat from Danielle
MASK: Vix mask no 244
TEMPLATE: Missy Template no 379
FONT: Aquarelle
Okay Lets Begin!
Open new canvas 500X500
Paste paper 1 as a new layer.
Activate your mask
Go to load/save mask
Load mask from disk
Find your mask and click load.
Open your frame paste them one by one.
Colorize to your liking with the paper of your choice.
Paste a tube of your choice as a new layer.
Place to your liking then paste your elements as a new layer.
Elements are
frame 1
beware word art
halloween wreath
halloween lights
pumpkin lantern
tricker treat bag
pumpkin candy bucket
pumpkin cupcake
black cat with skull
fluffy bat
ghost lollipop
monster 1
my sparkle
Dont forget to put drop shadow of choice to all layers.
Add your name and copyright info
You are done!
Thanks for trying my tutorial.
***Gorgeous Arie 2012***
ARTWORK: Artist @ ELIAS CHATZOUDIS
In Order to use the image in this tutorial you MUST purchase it from EAS
PSP 9 (Any Version Will Work)
SCRAP KIT: Sweet Candy Obsession from Shell
MASK: Vix mask no 235
TEMPLATE: no template
FONT: Love
Okay Lets Begin!
Open new canvas 500X500
Paste paper 6 as a new layer.
Activate your mask
Go to load/save mask
Load mask from disk
Find your mask and click load.
Open your candyring paste them one by one.
Colorize to your liking with the paper of your choice.
Paste a tube of your choice as a new layer.
Place to your liking then paste your elements as a new layer.
Elements are
candyring 1
bow 1
butterfly pop 1
candy jar 2
ice cream 3
cupcake 3
lollipop 5
chocolate bar 5
my sparkles
Pls resize to your liking.
Use my tag above as a guide.
I resize all my elements to 30% to 50%
Dont forget to put drop shadow of choice to all layers.
Add your name and copyright info
Now will go for my animation sparkle thingy lol
Some are doing different way this is how i did for my animation
:)
Go to layer 2(mask) constellation 2.20 50 60 0 100 75 click ok
Go to layer 3(candyring) add noise gaussian click no 40
Go to layer 12(cupcake) vm sparkle click no 20
First layer save them as tag1gif.
now do it again the same method but changing the number of the size :)
Go to layer 2(mask) constellation click random seed 1x
Go to layer 3(candyring) add noise gaussian click no 35
Go to layer 12(cupcake) vm sparkle click no 25
Second layer save them as tag2gif.
Go to layer 2(mask) constellation click random seed 1x
Go to layer 3(candyring) add noise gaussian click no 30
Go to layer 12(cupcake) vm sparkle click 30
Third layer saved them as tag3gif.
Lastly open yr jasc animation
Open yr tag1gif,tag2gif,tag3gif
Then view animation
Saved them as gif.
You are done!
Thanks for trying my tutorial.
***Gorgeous Arie 2012***
ARTWORK: Artist @ ELIAS CHATZOUDIS
In Order to use the image in this tutorial you MUST purchase it from EAS
PSP 9 (Any Version Will Work)
SCRAP KIT: Emogurl 1 from Shell
MASK: Vix mask no 232
TEMPLATE: NO TEMPLATE
FONT: P22 Corinthia
Okay Lets Begin!
Open new canvas 500X500
Paste paper 2 as a new layer.
Activate your mask
Go to load/save mask
Load mask from disk
Find your mask and click load.
Open your frame and paste them one by one.
Colorize to your liking with the paper of your choice.
Paste a tube of your choice as a new layer.
Place to your liking then paste your elements as a new layer.
Elements are
frame 3
bardwire 1
emo word art 1
emo banner 1
emo pop 1
yoyo 1
emo bear 1
emo cupcake 1
skullkeychain 1
my sparkle
Dont forget to put drop shadow of choice to all layers.
Add your name and copyright info
You are done!
Thanks for trying my tutorial.
***Gorgeous Arie 2012***